
Notifications are a convenient way to inform the user about something new that has happened on your site. There are many types of notifications. Here we will consider setting up push notifications in a SPA application written on the laravel + vue bundle.
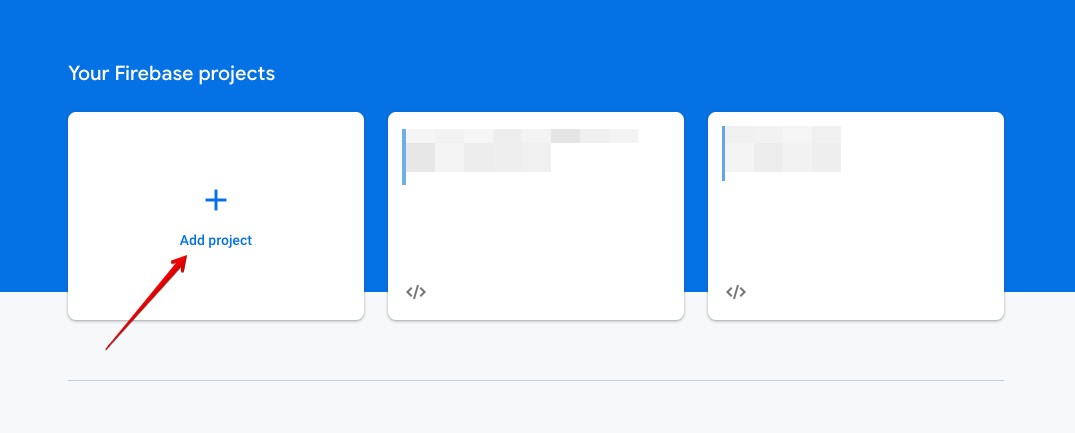
First you need to set up Firebase.
- Go to https://firebase.google.com/ and create an account.
- After registration, you need to go to the console https://console.firebase.google.com/
- Add a new project and application inside the created project.
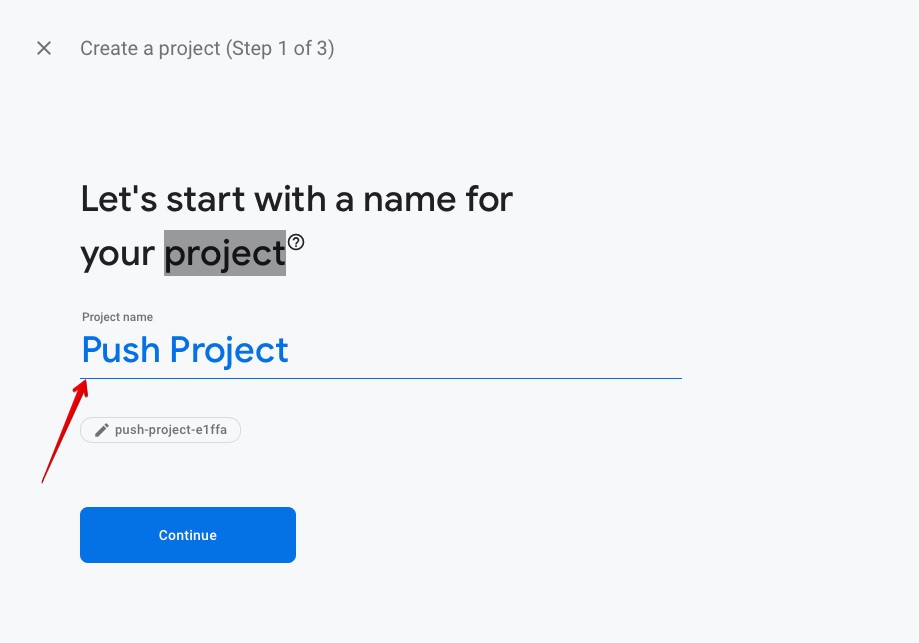
Click “Continue”, finish the registration and go to the console.
In the console, we continue our configuration.
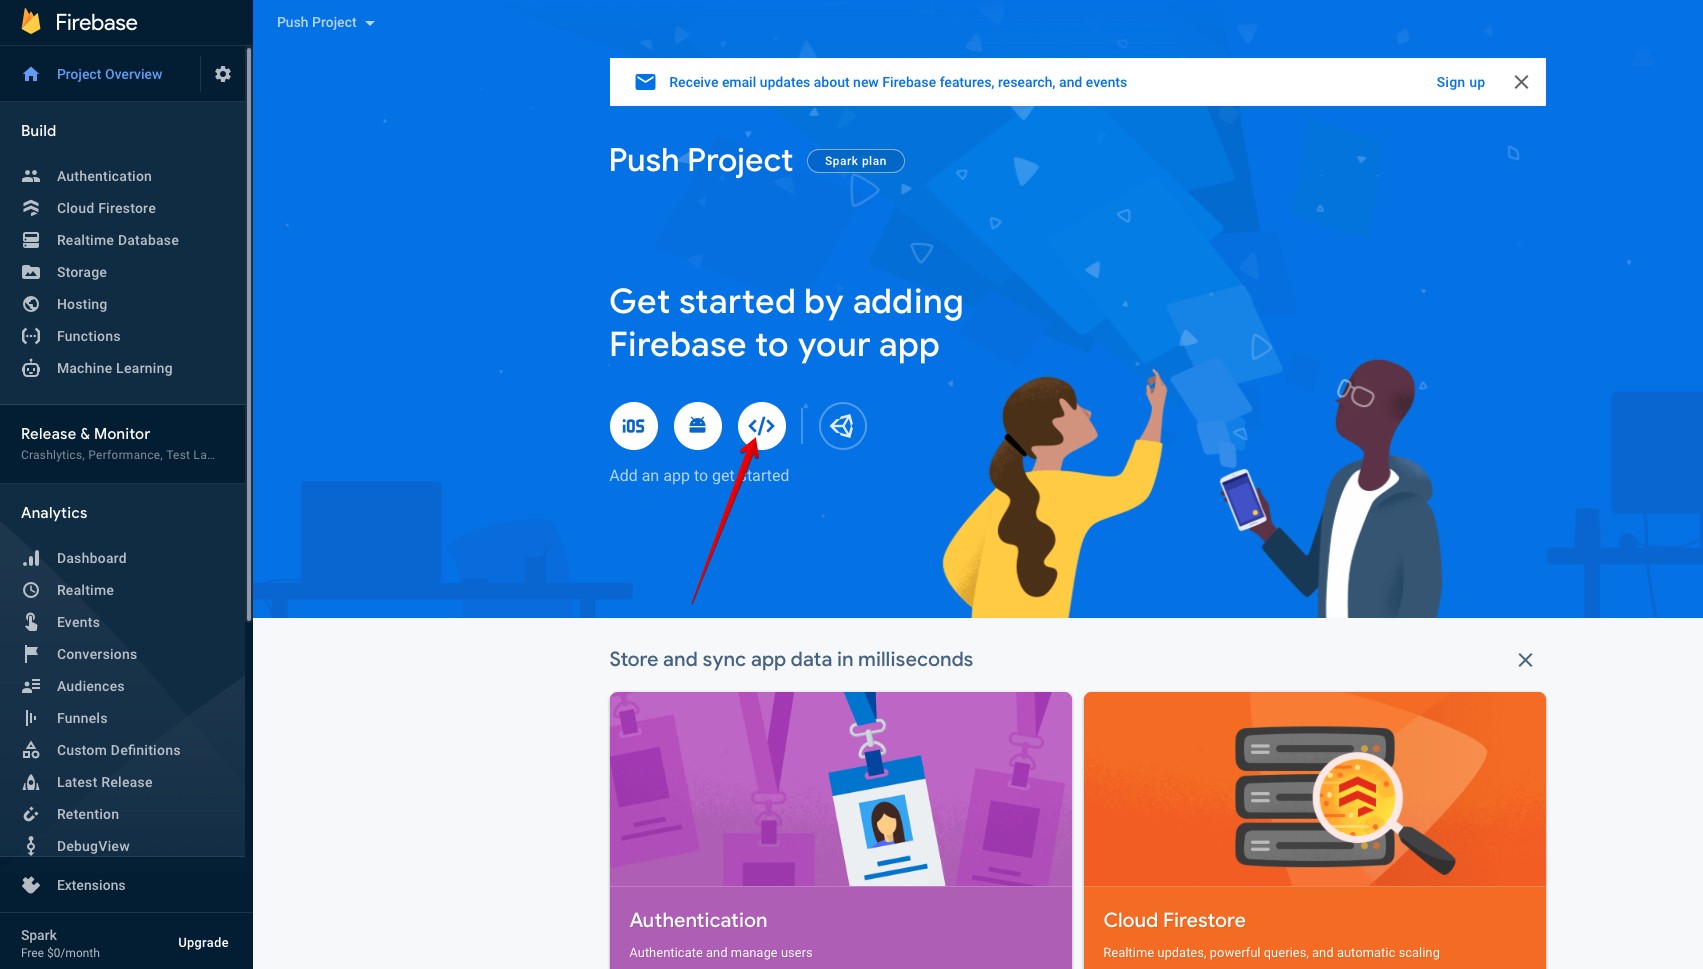
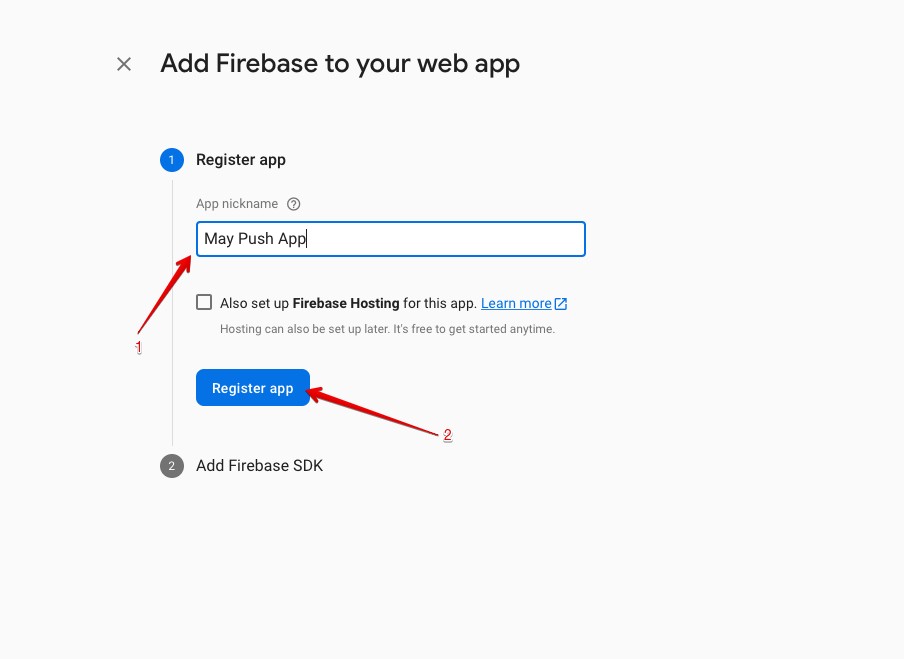
Add the name of the web application and register it.
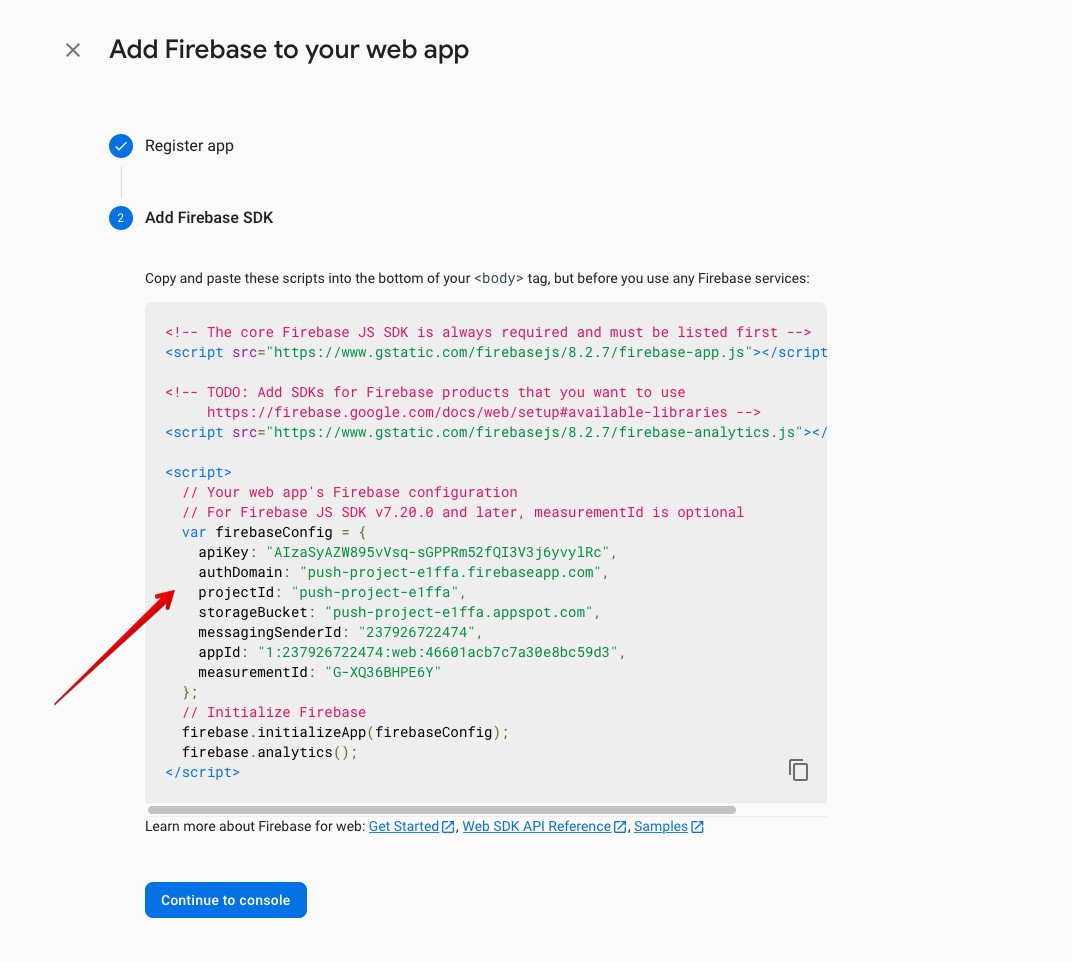
On the last page of the registration process, remember the code, we will need it in the future.
Firebase is configured, you can start initializing it in the project.
In the src folder of our SPA application, create a firebase.js file where we will write our code.
But first, let’s install a firebase in our project.
yarn add firebase
import firebase from "firebase/app";
import "firebase/analytics";
import "firebase/messaging";
import axios from "axios";
let firebaseInit = {
methods: {
firebaseInit: function () {
const firebaseConfig = {
apiKey: "AIzaSyAZW895vVsq-sGPPRm52fQI3V3j6yvylRc",
authDomain: "push-project-e1ffa.firebaseapp.com",
projectId: "push-project-e1ffa",
storageBucket: "push-project-e1ffa.appspot.com",
messagingSenderId: "237926722474",
appId: "1:237926722474:web:46601acb7c7a30e8bc59d3",
measurementId: "G-XQ36BHPE6Y"
};
firebase.initializeApp(firebaseConfig);
if ("Notification" in window && firebase.messaging.isSupported()) {
const messaging = firebase.messaging();
try {
messaging
.getToken({
vapidKey: "BI-LFBucwec4l41jhP58h9z-HT7KSRzRlh84LSM8LboYSm7ksGCz_Mu4WZQAyPa7ZRMOyIlLy7xcjACK9YSmmVE",
})
.then((currentToken) => {
if (currentToken) {
this.sendTokenToServer(currentToken);
} else {
console.warn("Failed to get token.");
}
})
.catch((err) => {
console.log(
"An error occurred while retrieving token. ",
err
);
this.setTokenSentToServer(false);
});
} catch (e) {
console.log(e);
}
messaging.onMessage((payload) => {
console.log("Message received. firebase.js ", payload);
new Notification(
payload.notification.title,
payload.notification
);
});
}
},
isTokenSentToServer: function (currentToken) {
return (
window.localStorage.getItem("sentFirebaseMessagingToken") ===
currentToken
);
},
setTokenSentToServer: function (currentToken) {
window.localStorage.setItem(
"sentFirebaseMessagingToken",
currentToken ? currentToken : ""
);
},
sendTokenToServer: function (currentToken) {
if (!this.isTokenSentToServer(currentToken)) {
axios
.post("rest/device/token", { token: currentToken })
.then((data) => {
if (data.data.status) {
this.setTokenSentToServer(currentToken);
}
});
}
},
},
};
export default {
firebaseInit,
};
Now let’s explain some things.
firebaseConfig – the data that we remembered during registration.
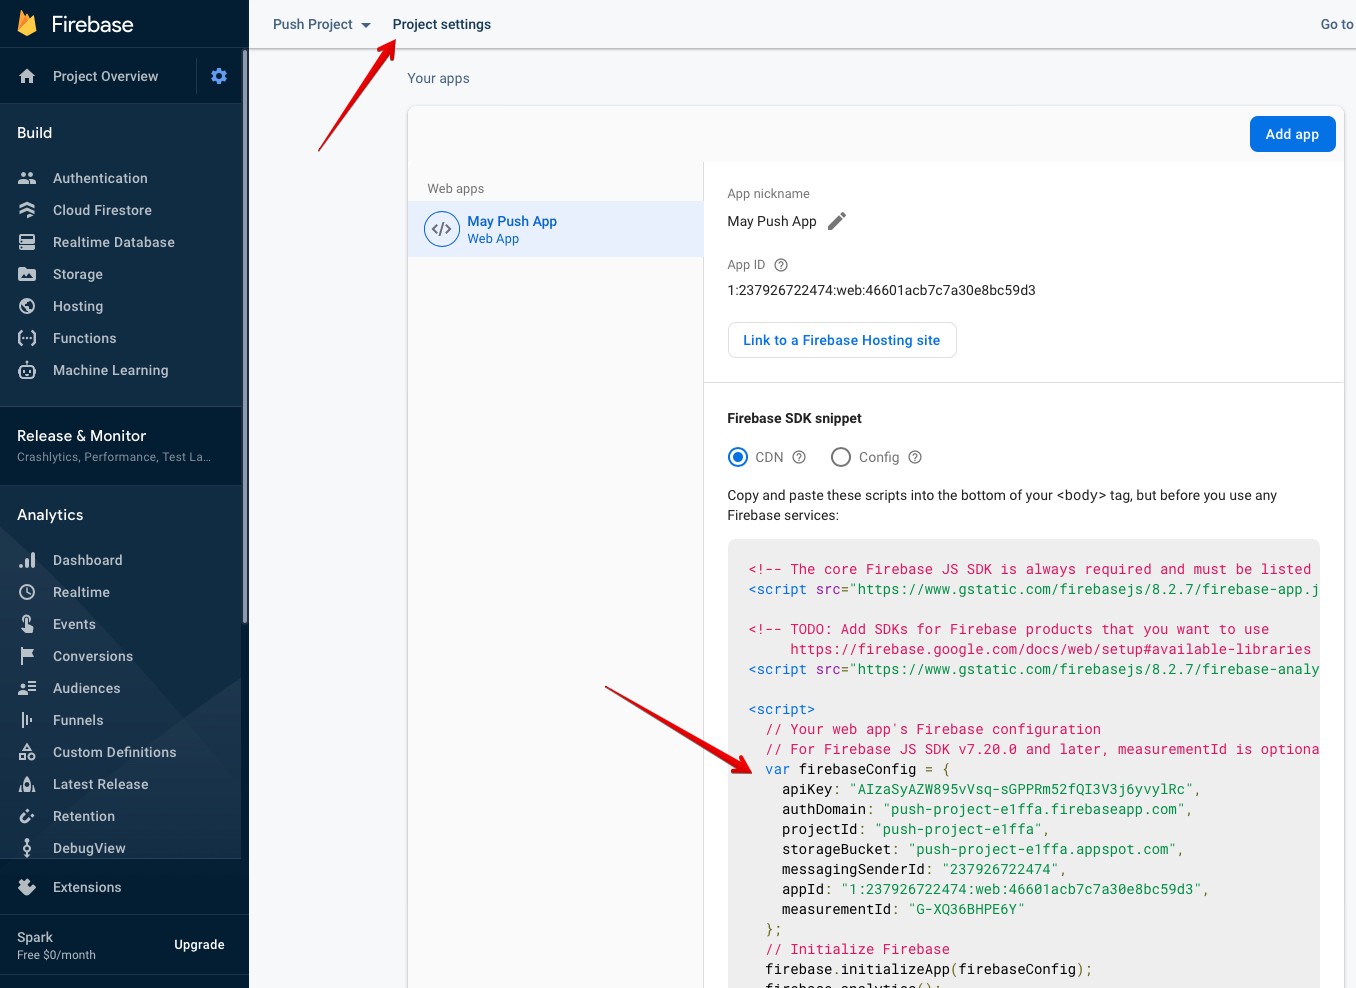
If you have forgotten them, you can find them here.
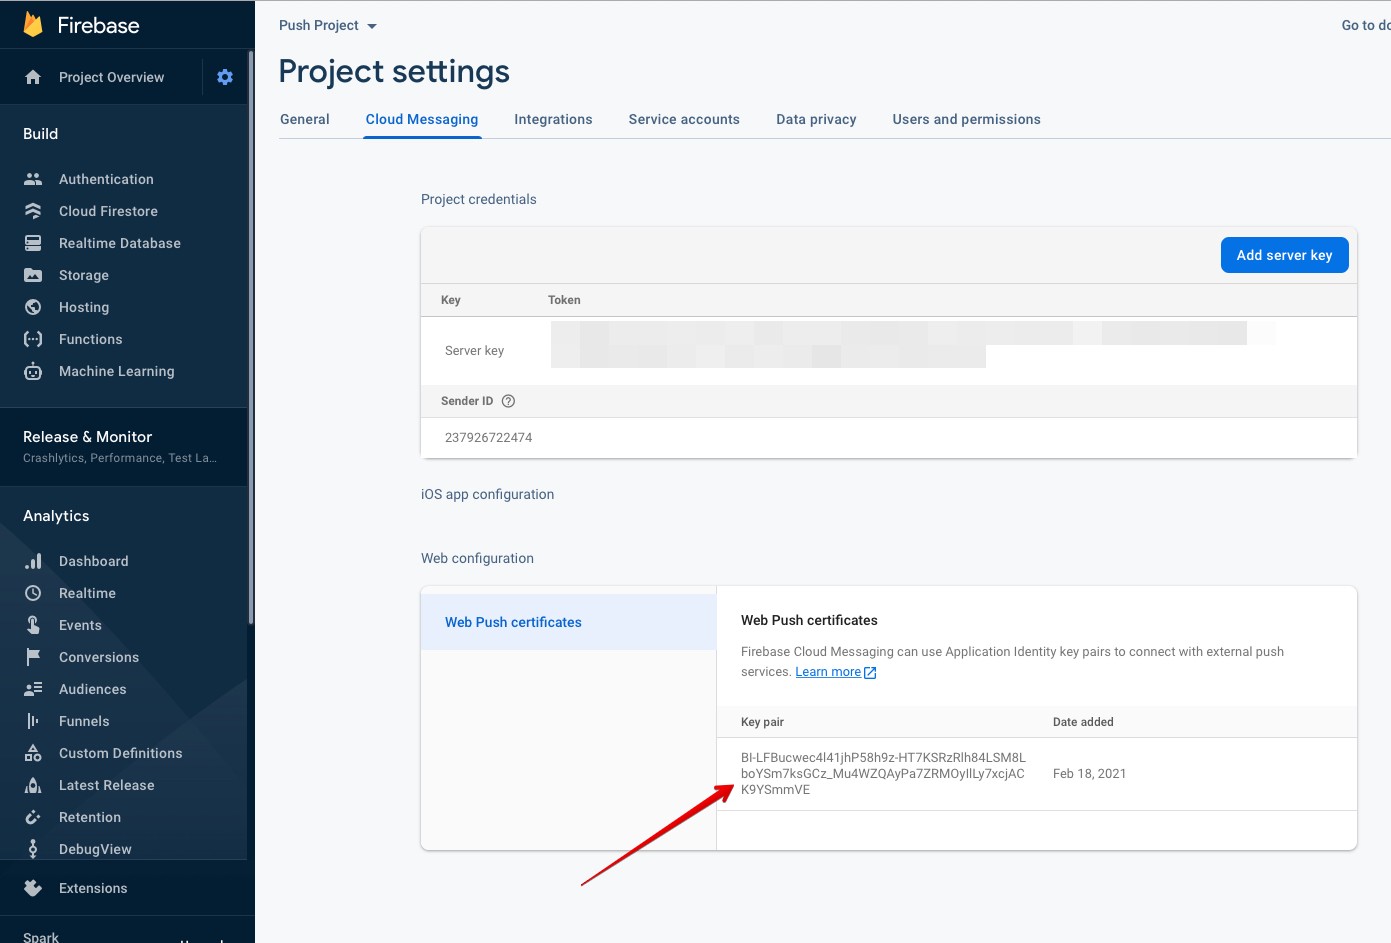
vapidKey – we also get it from the project settings, if it is not there, then there will be a button to generate it, just click it.
Now let’s cover some of the points described in firebase.js
In line 18, the firebase is initialized according to the provided config.
Since it is possible that the browser does not know how to make notifications, then in the next line (19) we check this in order to avoid an error in our application.
If all is well, then a messaging object is created and a request appears to allow notifications.
If the user agrees, we receive their token, which can now be stored in our database for future use.
You can also save the token in local storage and check if we have sent this token to our server, if not, then we send it.
For everything to work properly, you also need to initialize the Javascript worker, which will receive messages in the background and display them.
To do this, create a firebase-messaging-sw.js file in the public directory.
importScripts("https://www.gstatic.com/firebasejs/8.2.6/firebase-app.js");
importScripts("https://www.gstatic.com/firebasejs/8.2.6/firebase-messaging.js");
try {
firebase.initializeApp({
apiKey: "AIzaSyAZW895vVsq-sGPPRm52fQI3V3j6yvylRc",
authDomain: "push-project-e1ffa.firebaseapp.com",
projectId: "push-project-e1ffa",
storageBucket: "push-project-e1ffa.appspot.com",
messagingSenderId: "237926722474",
appId: "1:237926722474:web:46601acb7c7a30e8bc59d3",
measurementId: "G-XQ36BHPE6Y"
});
var messaging = firebase.messaging();
self.addEventListener("notificationclick", function (event) {
const target = event.notification.data.click_action || "/";
event.notification.close();
// This looks to see if the current is already open and focuses if it is event.waitUntil(
clients
.matchAll({
type: "window",
includeUncontrolled: true,
})
.then(function (clientList) {
// clientList always is empty?!
for (var i = 0; i < clientList.length; i++) {
var client = clientList[i];
if (client.url === target && "focus" in client) {
return client.focus();
}
}
return clients.openWindow(target);
})
);
});
messaging.onBackgroundMessage((payload) => {
console.log(
"[firebase-messaging-sw.js] Received background message ",
payload );
// Customize notification here
const notificationTitle = payload.notification.title;
const notificationOptions = {
body: payload.notification.body,
};
self.registration.showNotification(
notificationTitle,
notificationOptions
);
});
} catch (e) {
console.log(e);
}
We include our firebase.js in the main application file
import firebaseHelper from “./firebase”
In the mounted hook, we initialize firebase: this.firebaseInit ()
If everything is done correctly, then after loading the page, a request for permission to send notifications should appear.

Get a Custom Solution with Web Design Sun
At Web Design Sun, we specialize in building web applications for clients in every business and industry. If you’re interested in custom applications for your business, contact us today.
Contact us today to get started